
Flour, water, salt—yes, the ingredients are humble. But oh, the stories they hold.
Back when biscuits were currency and a good sourdough starter got more attention than a courting letter, Appalachian bakers were weaving magic out of pantry staples.
And here’s the kicker—it’s not fancy magic. It’s real, rugged, flour-on-your-shirt-and-a-dog-underfoot kind of magic.
Now, let’s get that apron on (or at least wipe the flour off your hands) because we’re going straight to the heart of Appalachian bread baking—where flavor trumps fuss and soul beats out science. Almost.
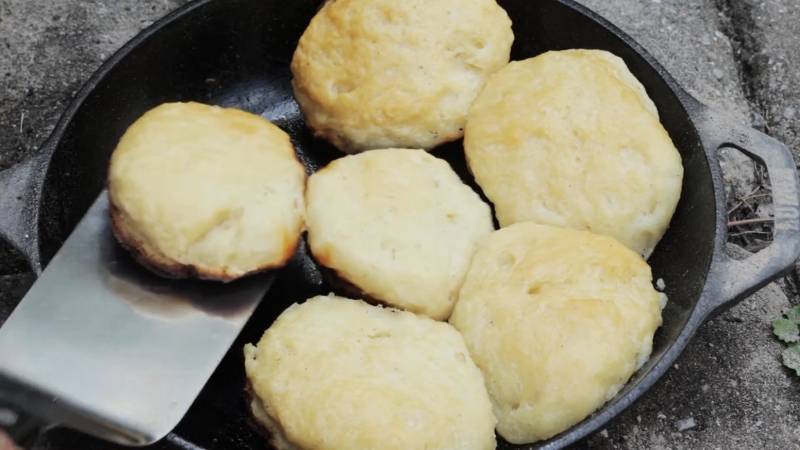
Recipe #1: Cast Iron Buttermilk Biscuits
The backbone of Appalachian baking. No mixer, no rolling pin. Just cold butter, hot cast iron, and a bit of technique that borders on magic.
Ingredients
- 2 cups self-rising flour
- 1/4 cup cold butter (grated or diced)
- 3/4 cup cold buttermilk
- 1 tbsp melted butter (for brushing)
- Extra flour for the counter
Let’s Make ’Em
Start by preheating your oven to 450°F, and throw a cast iron skillet in while it heats. That skillet needs to be hot—we want crispy, browned bottoms.
In a bowl, combine your flour and butter. Use your hands or a pastry cutter to work the butter in until the texture looks like coarse cornmeal with some larger, pea-sized butter pieces. (Those pockets of fat = flaky layers later.)
Add the cold buttermilk and mix just until the dough starts to come together. Don’t overmix—seriously, don’t. This dough likes to be left alone.
Turn the dough onto a floured surface and gently pat it into a rectangle about an inch thick. Fold it over on itself (like a letter), turn it 90 degrees, pat it down, and repeat 2 more times. You’re building layers here, not kneading bread dough.
Use a biscuit cutter or glass to punch out rounds. Press straight down—no twisting, or you’ll crimp the edges and mess with your rise.
Place biscuits touching in your hot skillet. Bake 12–15 minutes, until the tops are golden brown. Brush with melted butter as soon as they come out.
Quick Tips
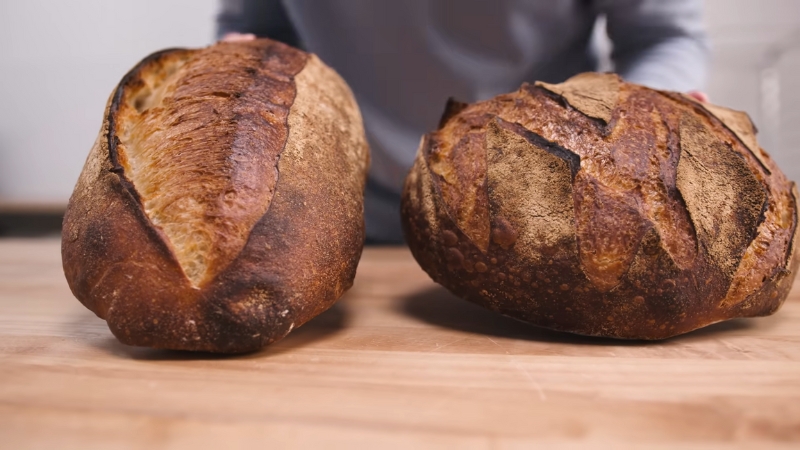
Recipe #2: Everyday Sourdough Loaf
View this post on Instagram
Sourdough used to be an Appalachian staple—starters passed down like heirlooms. It’s slow baking, but once you get in the rhythm, it becomes second nature.
You’ll Need
- 1/2 cup active sourdough starter
- 1 1/2 cups lukewarm water
- 3 1/2 cups bread flour (all-purpose works, but bread flour gives better structure)
- 1 1/2 tsp salt
Here’s How
@hayken11 Everyday Sourdough Loaf 🥖 Ingredients: 50-100 g active, bubbly sourdough starter 375g water 500 g bread flour 11 g salt Directions: Combine ingredients until a saggy dough forms. Cover and let rest for 30 min to 1 hr. Begin preforming 3-4 sets of stretch and folds 30 min apart. Cover and let rise on counter at room temp until doubled in size (6-8 hrs). Shape dough and place in floured basket. Place in fridge overnight for 12-24 hrs. Place dough on parchment paper, score, and bake at 425F for 20 min with the lid on and an additional 30 min with the lid off. #sourdough #sourdoughbread #homestead #fypシ #foodtiktok #sahm ♬ Lady May – Tyler Childers
In a large mixing bowl, combine your starter and water. Stir in the flour until you’ve got a shaggy, sticky mess. Cover with a towel and let it rest for 30 minutes.
Now add salt. Mix it in using the “stretch and fold” method:
- Wet your hand, reach under the dough, stretch it up, and fold it over.
- Rotate the bowl and do this four times—once per “side” of the dough ball.
Cover again, and let it rise at room temp for 4–6 hours. Every hour or so, repeat the stretch-and-fold routine. You’re building strength, slowly and gently.
Once the dough has roughly doubled, turn it out onto a floured surface. Shape it into a round or batard (oval) and place it in a floured banneton or towel-lined bowl.
Let it proof again for 1–2 hours at room temp, or put it in the fridge overnight (preferred—slower rise = better flavor).
Baking
- Preheat oven to 475°F with a Dutch oven inside.
- Carefully flip the dough onto parchment, and score the top (a simple slash or a cool pattern if you’re feelin’ artistic).
- Transfer to the hot Dutch oven, cover, and bake for 20 minutes. Then uncover and bake another 20–25 until golden and crackling.
Let it cool for at least 30 minutes (yeah, it’s hard) before slicing.
Tips & Techniques from the Appalachian Kitchen
Once you’ve got the basics down, bread baking becomes less about rules and more about rhythm. That’s the Appalachian way—feel your way through it, trust your senses, and don’t panic if the dough doesn’t behave exactly how you expected.
First off, your dough is going to talk to you. Not literally (though after a long proof, it might feel that way), but through texture and feel. If it’s tight and stiff, it probably needs more moisture—or a bit of rest.
If it’s loose and sticky, resist the urge to drown it in flour. Sometimes all it needs is a few folds and some time to come together. It’s like raising a stubborn kid: a little patience goes a long way.
Temperature? It’s a sneaky one. A cold kitchen will slow everything down. Proofing can drag out for hours, and that’s not always a bad thing—it can build more flavor—but you’ll need to plan for it.
On warmer days, things move quickly, so keep a close eye on your dough. Overproofing can sneak up on you and leave you with a sad, collapsed loaf that tastes fine but looks like it lost a fight.
Let’s talk gear. Cast iron isn’t just tradition—it’s a tool passed down for good reason.
It holds heat like a champ, gives you those crispy edges on biscuits and cornbread, and honestly, just feels right. If you don’t have one, get one. Use it enough and it’ll become a family heirloom.
And if you’re planning to make crispy buttermilk fried chicken, a cast iron skillet is a game-changer for that perfect golden crunch.
Now, mistakes? You’re gonna make ‘em. Everyone does. Biscuits that don’t rise, sourdough that goes flat, cornbread that sticks to the skillet—it’s all part of it. The important thing is to keep baking.
Learn from the flops, laugh at them, eat them anyway (maybe with a little more butter), and then try again. Every baker has a story about the time something didn’t turn out. Those stories are half the fun.